31 May 2016

enter, the fabulous baker boys

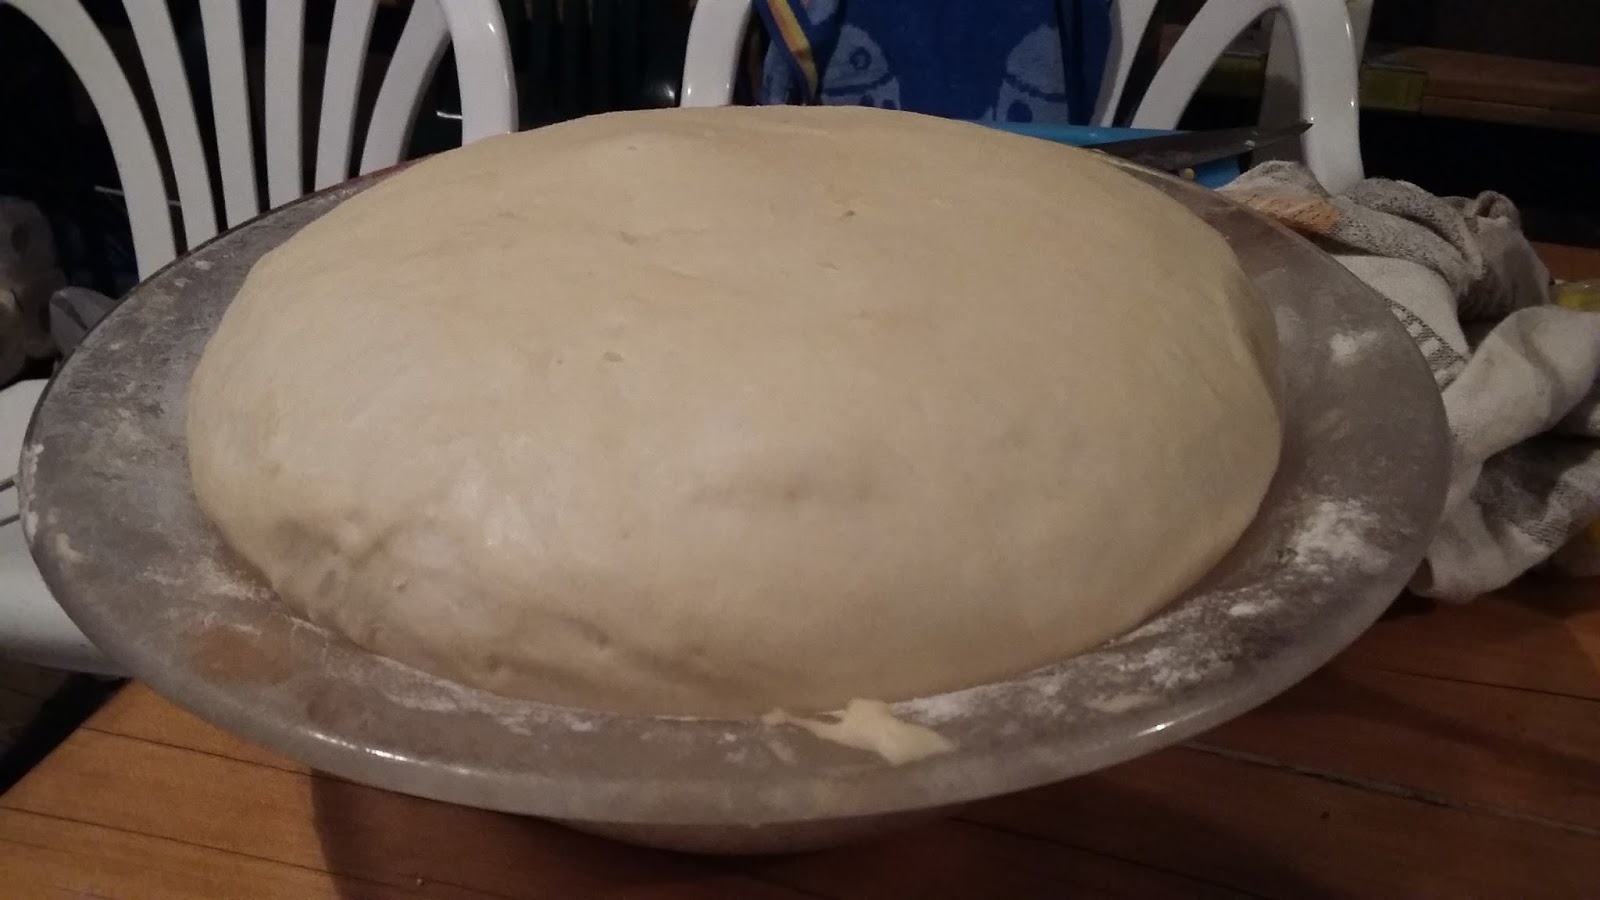
The fabulous baker boys.  Not the 1989 Michelle Pfeiffer film.  Two men in the kitchen, making bread.  Awesome!  Everyone loves the smell of freshly baked bread, and what better way for a young man to learn to make it, than with his Dad?  I'm very lucky to have an other half who genuinely loves being in the kitchen.  It makes for a much more interesting meal repertoire, and it means there's another male for the young males of the household to learn from.  And men do tend to cook in a different way that women - more shooting from the hip, wild west style.  Throw it in, stir it up, see what happens.  Then add a little more (especially if it's chocolate chips, or chilli).  

Anyhoo, moving on.  Bread.  It's arguably one of the more important foods in the world.  Right up there with rice and potatoes as a staple in most cultures.  There are a myriad of different types - a seemingly endless array of flavours, shapes, ingredients and uses.  As a side, a holdall (think tortillas), for dunking, for a food ol' sandwich.  For breakfast, for lunch, with dinner - heck, even desserts can include bread!  

Bread fills an spot socially as well, significant beyond its importance as a basic foodstuff.  It plays essential roles in both religious rituals and secular culture.  Its prominence in daily life can be seen reflected in language - it appears linguistically everywhere from proverbs ("know on which side your bread is buttered") to slang ("dough" for money), and even in the basic etymology of words ("company" - from Latin com 'with' + panis 'bread').  

This particular bread recipe comes from my lovely South African sister-in-law Cindy.  She showed the boys how to make it and cook it on the BBQ when we were on a holiday at the beach earlier this year.  It made a beautiful tasting bread, and was incredibly versitile - the first had some herbs through it; the second Kyle and Cindy made in balls, pushed together on the baking tray, to make an easy-pull-apart bread, with each piece stuffed with garlic, herbs and cheese; the third (made by Harry and Kyle just over the weekend) was made into two smaller loaves, spiced with cumin seeds and dried oregano.  Next time I think cumin seeds and dried rosemary are on the cards... 

1.5kg flour (high grade, if you have it) - this makes a lot of bread, half will make enough for most situations
8 g active yeast (make sure this is fresh, or not been sitting for toooooo long in the pantry)
500 ml warm water
3/4 tbsp brown sugar

1/2 tsp salt 
spices etc, if using 
  1. Put flour and salt in large bowl. 
  2. Fill cup with warm water, dissolve sugar in it then add yeast. 
  3. Once yeast has sunk to the bottom and begun to froth, mix with the flour.  
  4. Knead (in the bowl, or on a floured/oiled surface) for 15-20 minutes (it's a good idea to have a couple of you to share this job!)  Oil your hands, so they don't stick to the dough as it forms.  Add more water as necessary. 
  5. Clean bowl, lightly oil and place the ball of dough back in it.  Cover with a teatowel and place somewhere warm to rise (I go with the hot water cupboard, or in the oven - turn it on for a few minutes before you need it, then turn off).   Leave it for about an hour.
  6. Once risen you can either bake (180 degrees celcius for about 25-30 minutes), or repeat steps 4 and 5 first.  
  7. You'll know it's ready to take out of the oven (or BBQ) when you can start to smell it.  It should be a nice golden colour too.  You can brush the top with egg/milk prior to cooking, but it won't matter if you don't.  


05 May 2016

You put da lime in da crockpot and heat dem bode up...


How do you say 'fajita'?  It's fageeta mate.  Anyone remember that ad on TV about 15 years ago?  Anyhoo, I love fajitas.  Like an enchilada, but not baked; like a burrito, but without as much salad in them; like a quesadilla, but with less cheese (and not flat!).  And as with most tex-mex foods (the mexican variety of this dish is called arrachera), tasty as hell.  

These ones came along after I saw an idea for slow-cooker fajitas on a Facebook page 'Tasty'.   There is a list of ingredients on there, if you're interested in making your own taco seasoning.  I loved making these because it just looked so colourful in the pot.  And my hands smelled of lime juice for the rest of the afternoon, bonus!  And the best part - they were all done at the end of the day, which meant we could pour a glass of wine, enjoy a really tasty meal, and just relax.  

1/2 onion, sliced (I also used a red spring onion)
2 capsicums, sliced
2 carrots, cut into little pieces
500 g chicken breast, cut in half longways 
taco seasoning (I used Old El Paso)
3 cloves garlic, diced 
tin tomatoes, drained of bulk of liquid
lime 
  1. Sprinkle 1/2 of your onion, capsicum and carrot in bottom of crock pot (slow cooker).
  2. Add chicken, sprinkle with 1/2 taco seasoning (about 2 tbsp), turn pieces and repeat with remainder of seasoning.  
  3. Sprinkle garlic over chicken, pour tomatoes over all.  
  4. Layer other half of onion, capsicum and carrot over top of tomatoes.  Squeeze lime juice over.  
  5. Cook on high for 3-4 hours.  
  6. Remove chicken and cut/shread (chicken cooked longer will shred more than cut, so cook to your preference).  Return chicken to crock pot and simmer on low until ready to serve (not much more than half an hour - turn off and reheat later, if likely to be longer than that).  
  7. Assemble on your tortillas with grated cheese, sour cream, guacamole, salsa, refried beans...  

04 May 2016

Zucchini bolognese

It's been a long time, shouldn't of left you (left you), without a dope beat to step to...

Aaliyah and Timberland aside, it has been a long time.  3 and a bit months since I last put a post up.  Apologies mes amis, all I can say is that summer holidays were cray cray, and I just wasn't all that much in the kitchen.  

However, back into it people.  And to get things started, I'll introduce you to my newest kitchen toy - spiraliser!  So far I've only used it to make zucchini 'pasta', but the same can be done with carrots, beetroot, and I suppose potatoes and kumara.  I started with zucchini 'cause they're already fairly soft and flexible, so pretty close (even completely uncooked) to cooked pasta.  

I spiralised the zucchini (two medium sized and two small) and laid the lot on a paper towel, to absorb some of the excess water.  When we were ready to eat KB sauted the lot in a little butter.  We served the zucchini on top of the bolognese, so as to retain some of the crunch (it was still more or less raw).  If you wanted an even softer, more cooked 'pasta', you could fry for a bit longer, or even steam it for a bit.  


For the bolognese... 

1 small onion, diced
500 g mince (I used beef)
2 tbsp tomato paste
2 tbsp pesto (optional, but I had a heap of pesto cubes in the freezer) 
good dash worchester sauce
2 cups beef stock (I like fresh stock, less salty and more flavour)
1 tin tomatoes 

  1. Saute the onion in butter.  Add the mince and brown slightly.  
  2. Add all other ingredients and bring to the boil.
  3. Reduce heat to low and let simmer for a couple of hours, until the liquid has reduced to leave a nice, thick meat sauce.  
  4. Serve with pasta, vegetables (as above), and grated cheese.  Buon appetito!! 


19 January 2016

Quick and easy, curry to the rescue!

So it's been a little over a month since I last blogged.  We have been eating, but it's been a lot of BBQ, salads and the like, so not reallllllly something to blog about.  I'm pretty sure no one needs to know how we cook our steaks, in a step-by-step tutorial.  However, it's time to get back amongst it, and to start off I'm going to share the absolutely amazing yellow curry KB cooked for dinner over the weekend (try saying that ten times fast!).  

A curry is such a great meal - it's warming in winter, but something that works in summer too.  You can use any meat (I prefer chicken or prawns, personally), whatever veges you have to hand, and enjoy it with rice, or even with some new potatoes on the side.  And roti.  Always with roti, nom nom nom...  This was enough to serve four.  

2 chicken breasts
1 onion, diced
2 cloves garlic, finely chopped
good grating of ginger root
2 cups veges (we used beans, capsicum and zucchini from the garden, plus some frozen peas and broccoli)
1 spring onion, sliced up (use the whole thing) 
fresh herbs (we used coriander, basil, majoram and chives)
good dollop of curry paste (KB used about 3 tbsp of AYAM yellow curry paste)
tin coconut cream
1 L chicken stock (homemade, or store-bought liquid is best, powdered is too salty) 
rice to serve (I cooked 1 cup dry rice and that was enough)
roti/naan to serve 
coriander and nuts, to sprinkle on top

  1. There are a couple of ways you could cook your chicken for this - you can bake the two breasts, then shred the meat when it's cooked, ready to stir into the curry at the last minute.  Or you can chop the breasts up and add them to the curry once the stock and cream have heated through, and let them cook in the curry.  I prefer the first way, but it means you sort of need to get that done first.  
  2. Saute onion, garlic and ginger.  Add spring onion, curry paste and herbs, stir to coat everything.  
  3. Add coconut cream and stock.  If adding the chicken at this stage, so this once the liquid is heated up and put a lid over the pan.  Let the chicken cook, then remove the lid.  
  4. Add veges and simmer for a few minutes until they are cooked.  
  5. If adding shredded (or get some pre-cooked roast chicken from the supermarket deli), stir this in now.  
  6. Plate up, sprinkle with coriander and nuts, and enjoy!! 


15 December 2015

Christmas Day canapés - DIY-buttermilk blinis

I made a batch of pikelets on the weekend, for Harry to take to school as part of a shared lunch.  It had been a while since I'd bothered making these delicious little morsels, and I'd forgotten how quick they are to make, and how many you get in a batch (I make small, bite-sized pikelets).  Anyhoo, it got me thinking that these would be a good base for some Christmas Day canapés.  

However, I want these to be less sweet than your typical pikelets, otherwise known in their smaller-size as blinis, so I reduced the amount of sugar used, added some lemon zest to the mix, and used buttermilk in place of milk (actually, I used milk with lemon juice, canny eh?).  The result?  Light little blinis which are going to be perfect with a little cream cheese and salmon.  This batch will be long gone before Christmas, but I'll make another next week (though you can make these now, and freeze them until you need them).  

1 cup flour
1 tsp baking powder
1/4 tsp salt
up to 1/4 cup sugar 
1 egg 
3/4 cup buttermilk (or 3/4 cup milk with juice of half lemon squeezed in)
zest of one lemon
  1. Squeeze lemon juice into milk, if making your own buttermilk.  Set aside for a few minutes.  
  2. Put everything into a bowl and stir to combine, until free of lumps.  
  3. Melt butter in pan, fry in batches.  Remove to cooling rack, or eat straight away.  

09 December 2015

Frankincense to offer have I

I like Christmas carols.  I know they can be annoying, especially in shopping malls, but there's just something a little bit magical about some of them.  We Three Kings is one I've always liked, so when I saw some lotion bars on Wellness Mama using gold, frankincense and myrrh, I knew they were something I needed to try.  And they smell and look so beautiful, I can't wait to give them to people for Christmas!  I made two batches, one as Katie did on her blog, and one which used different oils, as an adjustment for skin sensitive to fragrances.  


Gold, frankincense and myrrh bars

1/3 cup coconut oil
1/3 cup shea butter
1/3 cup beeswax
2 tsp gold mica powder (I reduced this from the original 'cause I was using a very very fine satin mica - if you use a more coarse mica, like a sparkly mica, you may like to up this to 1 tbsp)
15 drops each frankincense and myrrh essential oils
5-10 drops peppermint essential oil

Sensitive skin bars 

1/3 cup olive oil
1/3 cup shea butter
1/3 cup beeswax
1 tsp gold mica powder
calendula petals 
5-10 drops lavender essential oil (optional, I left this out this time) 

  1. Melt shea butter, beeswax and coconut/olive oil in a double boiler (I put them in a large glass jar, which I then put into a pot with some boiling water in it).  
  2. When all melted, remove from heat and add other ingredients (I left the sensitive skin batch on for a while, to allow the calendula to release its goodness into the oil). 
  3. Carefully pour into silicon muffin tins, or into deodorant containers, like the white ones I used - I bought those from Go Native NZ.  
  4. Once hardened, rub onto skin for a nourishing natural shimmer.  

04 December 2015

Havana Christmas - aka vanilla latte sugar scrub

Coffee, sugar, vanilla, coconut...sounds like a festive hot drink.  And you could totally make an amazing drink from this, I'm sure.  I love the smell of coffee and I love drinking coffee, so I'm pretty excited to be adding it into my skincare routine.  This simple scrub smells like a vanilla latte, hence its name, and leaves the skin really silky.  It smells and looks sophisticated, but is incredibly simple and inexpensive to make, so makes a perfect gift for friends and family for Christmas!  I'm going to make a second batch, so I can keep some too!

Here's a run-down of the benefits of these tasty ingredients...
  • Coconut Oil – naturally nourishes skin (I used an organic virgin oil which is also super cheap, from Go Native NZ - $21/kg!!)
  • Olive Oil – contains antioxidants 
  • Coffee - caffeine has a tightening and stimulating affect on skin 
  • Sugar - naturally exfoliates
  • Vanilla – smells good :) 
1/4 cup finely ground dry coffee (I used my favourite, Havana)
1/2 cup sugar
2 tbsp coconut oil 
2 tbsp olive oil (it was supposed to be made with castor oil, but I didn't have any)
1 tsp vanilla essence 
  1. Place coffee and sugar in medium-sized bowl. 
  2. Add vanilla, mix well. 
  3. Add oils and stir with a fork until well mixed and moistened.  
  4. Stir in an air-tight container.  
Keep in the shower, so you always have it handy to keep your skin feeling great!